First off, you have to decide what you want from your car. Is it going to be a race car for a certain class which may have strict rules regarding wheel tubs? It may be a street car that you simply want to have sitting a bit lower and tuffer, with a bigger set of rims of course! Either way, it is still the same amount of work, but there is certain rules you must abide by for ANDRA or the beloved RMS.
After you have picked your car, don’t rush into it and start hacking it up straight away. Measure everything twice, and cut once, you will save yourself time in the long run.
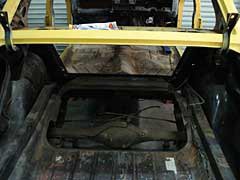
First of all, put your car on car stands, and get your car level, using a spirit level on your sill panels and across you boot and parcel shelf. Sometimes cars will be out of level from factory (one side may be level, the other may be slightly out!), if this is the case, split the difference.
Now its time to start taking measurements. With your diff in place, use a plumb bob and texta to mark your centre line of your diff, and use a ruler and texta to mark the position of you diff from front to back onto your quarter panel. Now you can take your diff out.
Next step is to sort out ride height. This is where it helps to have the wheels you wish to run with, but it is not necessary. On a factory car, the standard chassis rails are usually the limiting factor in setting your car super low, so I usually just go off this. I set the tubs as high as I can. Be realistic, you can’t put a set of 32” slicks on a Gemini by mini-tubbing it. keep in mind things like boot hinges etc that may hinder where you can place them.
Now I set a tube in place of the diff, to simulate the centreline of the tubs. It is a 1” diameter tube, with two small sleeves that get tack welded onto the chassis. This allows the 1” tube to slide through the two sleeves, that all measurements can be taken from, and both sides can be identical in position. Also, the tube can also be slid out of the way when not needed. In this instance, I set the centre of the tube approximately 2” from the chassis rails. Ensure the tube is level, and in the correct position from front to back. Use the measurements that you took earlier to do this. And double check by measuring from the crossmember or a sub-frame connector, to the tube. Take your time on this, as all measurements will be taken from this tube, and if it is put in crooked, or not level, it will be reflected in the finished product.
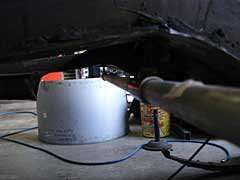
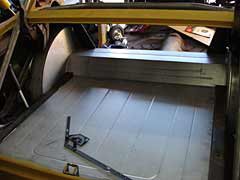
Now you can cut out the standard tubs. Take care not to get too carried away, just cut out the basic tub. I use a 100mm grinder with the 1mm thick cutting discs.
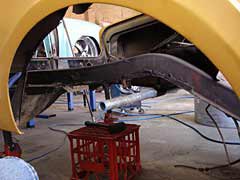
Grab a tape measure and start measuring and marking where your tubs will sit. In this instance, the tubs were 33”, so from the tube I measured half of this, minus half of the tube. (33 divided by 2 = 16 ½ .– ½ = 16”)
Only measure front to back at this stage. Cut on the inside of your lines.
Now get a piece of MDF, and trace a template from your tubs. Cut it out and also trim a 1”semi-circle, ½” deep out of the bottom edge, in the middle, to slide on the previously fitted tube. Now you have to make the template fit into the hole, by trimming away a bit at a time.
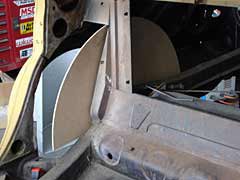
Now it is time to mark out the curve of the tub. Once the template slides freely along the tube, place it against the sides, marking out and cutting along the way, to get the template to go all the way, without hitting anything. DO NOT get carried away, as it is easier to trim it twice than to put missing metal back in!
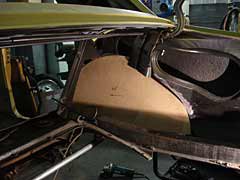
Once your template fits, it is time to mark out and slice up your tubs. Again, take your time, unless you like forking out money for a second set of tubs. To do this, mark your template from front to back, in 1” increments, on both sides, and number them. With your template sitting hard against the inside edge, simply grab a tape measure or steel rule, and measure from the inside edge of the template, to the inside of your quarter panel and write it all down. Keep everything square and level. Once you have completed this for both sides, transfer the marks onto your wheel tubs. Measure from the inside edge of the wheel tubs, and transfer your measurements to the tubs. This is where you need to call on your pre-school training, by joining the dots. Cut on the line, and if you have done everything right, it will be close to fitting. If you haven’t, call me for another set of tubs!
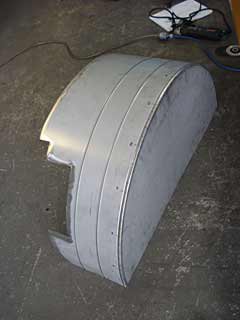
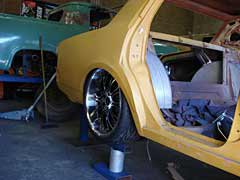
Now its time to fit them. They are awkward and hard to handle and fit, so take your time. Trial fit them, and mark where they touch the inside of you quarter panel, remove them, and trim again. Continue this process until you have approximately 5mm clearance all round. This will be sealed later.
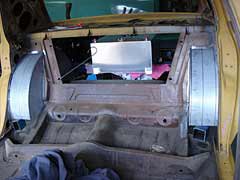
You are now ready to start welding. If you are not an experienced welder, I suggest this is not the time to learn. Grab a mate who can weld, and give him a case of beer to do it for you.
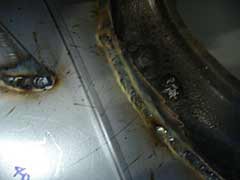
Now make fill in pieces for the bottoms of the tubs, and weld them in. Finally, grab some SIKAFLEX from your local panel beating supplies, or from racemod.com.au and seal the tubs to the quarter panels. Place some masking tape on the underside, between the tubs and quarter panel, and do the top first. The next day, remove the masking tape from the underside, and seal it too, Run some sealer over your welds also, but not before talking to your engineer, as he may want to inspect them before they are covered in sealer.
For more information, pictures, or any of these parts, feel free to contact us.
We have the tubs, sealer and cutting discs in stock. Also a complete kit with the tubs, cutting & grinding discs and sealer is available.